The difference between a farm stand product listing that gets orders and one that gets scrolled past is almost always the photo. A good product photo tells the customer exactly what they are buying — the color, the size, the freshness — without reading a single word. A bad product photo (blurry, dark, cluttered, taken from a weird angle) makes even great products look unappealing.
You do not need a professional camera or photography skills. A smartphone, natural light, and a few basic techniques will produce photos that look professional and drive online sales. This guide covers exactly how to photograph farm stand products using only your phone.
The short version: Shoot in natural light (near a window or outside in shade), use a clean simple background (white cloth, cutting board, or a plain table), hold your phone steady at a slight angle above the product, and take 3 to 5 shots of each product. Use the best one. The most common mistakes are bad lighting (too dark, direct harsh sun), cluttered backgrounds, and photos taken too far away. Get close. Fill the frame with the product. Show the detail — the shine on a tomato, the texture of bread crust, the colors in a jar of jam. One good photo sells more than a paragraph of description.
Why Photos Matter More Than Descriptions
When customers browse an online ordering page, they make purchase decisions in under 2 seconds per product. In those 2 seconds, the photo does 90 percent of the work. The product name and price fill in the remaining 10 percent.
A study by Etsy found that listings with high-quality photos sell 3 to 5 times more than listings with low-quality or no photos. The same principle applies to farm stand product pages — a bright, clear photo of ripe tomatoes will outsell a text listing that says "tomatoes, $4/lb" every time.
What "good" looks like:
- Bright, well-lit photo with natural colors
- Product fills most of the frame
- Clean, uncluttered background
- Sharp focus on the product
- True-to-life colors (not over-filtered)
What "bad" looks like:
- Dark or shadowy (shot indoors with bad lighting)
- Product is tiny in the center of a cluttered scene
- Blurry or out of focus
- Over-filtered (Instagram filters make food look unnatural)
- Shot from too far away
For more on using your phone for product photography, see our guide to taking product photos with just your phone.
The Equipment You Need (You Already Have It)
| Item | Why You Need It | Cost |
|---|
| Smartphone (any recent model) | Takes the photos | Already have it |
| A window | Natural light source | Free |
| White cloth, towel, or poster board | Clean background | $0–$5 |
| Cutting board or wooden surface | Warm, natural background option | Already have it |
| Your products | The subject | Already have it |
That is the entire equipment list. No camera, no lights, no tripod, no editing software. Your phone's built-in camera and a window with natural light are all you need.
Optional (nice to have but not required):
- A phone tripod ($10 to $20) for steady shots
- A white foam board ($3) for bouncing light onto the shadow side of the product
- A photo editing app (Snapseed, free) for minor brightness and contrast adjustments
How to Set Up Your Photo Space
Step 1: Find Your Light
Natural light is the key to good food photography. Set up near the largest window in your house — north-facing windows give the most even light, but any window works.
Light rules:
- Shoot during the day. Morning and early afternoon light is best.
- Use indirect light. Place the product near the window but not in direct sunbeams. Direct sun creates harsh shadows and blown-out highlights.
- Avoid overhead kitchen lights. Fluorescent and LED ceiling lights cast yellow or blue color shifts that make food look unappetizing. Turn off overhead lights and use only the window light.
- If the light is too harsh: Hang a thin white sheet or curtain over the window to diffuse it. This creates soft, even lighting that flatters food.
Step 2: Set Up the Background
Place your background surface near the window. Two options work for virtually everything:
- White background (white cloth, white poster board, white butcher paper). Clean, neutral, makes colors pop. Best for: colorful produce, jams, honey, baked goods.
- Wood surface (cutting board, butcher block, wooden table). Warm, natural, rustic. Best for: bread, eggs, herbs, whole produce, anything that looks good in a "farmstead" context.
Keep the background simple. No patterns, no clutter, no props that distract from the product. The product is the star.
Step 3: Arrange the Product
Less is more. A single jar of jam on a white background looks better than 6 jars crammed together with a gingham cloth, a spoon, a label, and a candle.
Arrangement principles:
- One product per photo for listings. Each product on your ordering page gets its own photo showing exactly what the customer will receive.
- Group shots for social media. A beautiful spread of your full product lineup works for Instagram and your farm stand banner photo, but individual listings need individual shots. If you sell through an online ordering page, each product gets its own listing with its own photo — this is where individual shots matter most.
- Show quantity. If you sell tomatoes by the pound, photograph roughly a pound of tomatoes. If you sell bread by the loaf, show one loaf. The photo should match what the customer receives.
- Show the label. For packaged products (jam, honey, pickles), photograph the product with the label visible. Customers want to see the label, the color of the product through the glass, and the overall presentation.
How to Take the Shot
Camera Settings
- Use the default camera app. No special apps needed.
- Turn off the flash. Always. Phone flash makes food look flat and harsh.
- Tap to focus. Tap the screen on the product to set focus. The phone will auto-adjust brightness.
- If the photo is too dark: Tap to focus, then swipe up on the screen to increase exposure (brightness). Most phone cameras support this.
- Use the 1x lens. Do not zoom. Zoom reduces quality. Move your phone closer instead.
Angles
Three angles cover every farm stand product:
- 45-degree angle (most versatile). Hold the phone at roughly a 45-degree angle looking down at the product. This is the most natural viewing angle — how you would see the product sitting on a table in front of you. Use this for: most produce, baked goods, packaged products.
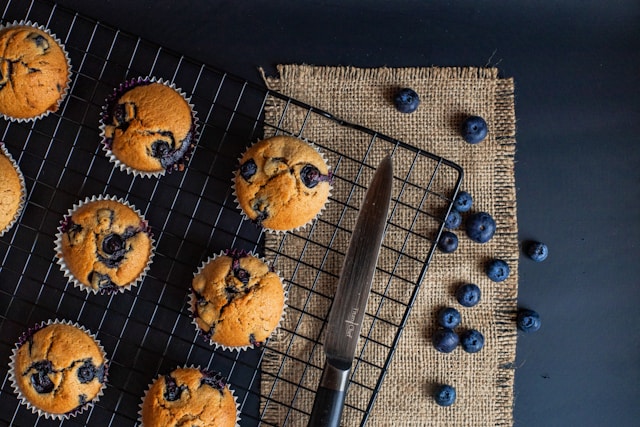
- Straight-down (overhead). Hold the phone directly above the product looking straight down. Best for: flat items like cookies or flat arrangements of produce, colorful spreads.
- Eye-level (straight on). Hold the phone at the same height as the product and shoot straight across. Best for: bottles, jars, tall items like bread loaves, or products where you want to show the label.
Take 3 to 5 shots from each angle. Pick the best one later.
Common Mistakes
- Too far away. Get close. The product should fill at least 60 to 70 percent of the frame. If you can see your entire kitchen in the background, you are too far away.
- Tilted horizon. Keep the phone level. A crooked photo looks amateur. Use the grid lines in your camera app (Settings > Camera > Grid) to align straight.
- Shadows on the product. Your own shadow falling on the product ruins the shot. Position yourself so your shadow falls behind you, not on the subject.
- Dirty background. Crumbs, stains, scratches, and clutter in the background distract from the product. Wipe down surfaces before shooting.
- Over-editing. A small brightness and contrast adjustment in Snapseed or the phone's built-in editor is fine. Heavy filters, extreme saturation, or artistic effects make food look fake. Keep edits subtle.
Quick Editing (Optional but Helpful)
If the photo is good but needs a small boost, two adjustments make the biggest difference:
Brightness
If the photo is slightly dark, increase brightness by 10 to 20 percent. Do not go higher — over-brightened photos look washed out.
Contrast
If the photo looks flat, increase contrast by 10 to 15 percent. This makes colors pop and edges sharper.
Both adjustments take 10 seconds in the phone's built-in photo editor (no app needed). On iPhone: Edit > Adjustments > Brilliance and Contrast. On Android: Edit > Adjust > Brightness and Contrast.
Do not crop unless you need to remove something distracting at the edge of the frame. Cropping reduces resolution, which reduces image quality on your listing page.
Product-Specific Photo Tips
Produce (Tomatoes, Berries, Greens)
- Show the color — produce sells on visual appeal. Bright red tomatoes, deep purple berries, vibrant green lettuce.
- Add a light water mist for freshness (spray bottle of water, mist gently). Droplets make produce look just-picked.
- Arrange in odd numbers (3 tomatoes, 5 peppers). Odd groupings are more visually appealing than even.
- Show variety: mix heirloom tomato colors, arrange berries by type.
Baked Goods (Bread, Cookies, Pastries)
- Show texture — the crust on bread, the surface of a cookie, the layers of a pastry. Get close.
- Shoot at eye level for bread (shows the rise and crust) or 45 degrees for cookies (shows the top).
- Cut one item to show the inside — a cross-section of bread showing the crumb structure is more appetizing than a sealed loaf.
- Use a warm-toned background (wood cutting board) for baked goods. Wood complements the brown and golden tones.
Jars (Jam, Honey, Pickles, Sauces)
- Position so the label is readable and the product is visible through the glass.
- Back-light jars slightly (window behind the jar) to make the contents glow.
- Show the product open alongside the closed jar — a spoonful of jam next to the jar shows color and consistency.
Eggs
- Photograph in the carton (shows quantity and how they are packaged for sale).
- Mixed colors sell the photo — a rainbow dozen is more eye-catching than 12 brown eggs.
- Shoot slightly above at 45 degrees so you can see both the eggs and the carton.
- Natural background: nest or straw props work here because they reinforce the "farm-fresh" story.
Microgreens
- Top-down angle is best — shows the density and color.
- Photograph in the selling container (clamshell or bag).
- Get close enough to see individual leaves. Microgreens look best when you can see the detail.
- Bright background (white) makes the green pop.
Using Your Photos
Once you have good product photos, use them everywhere:
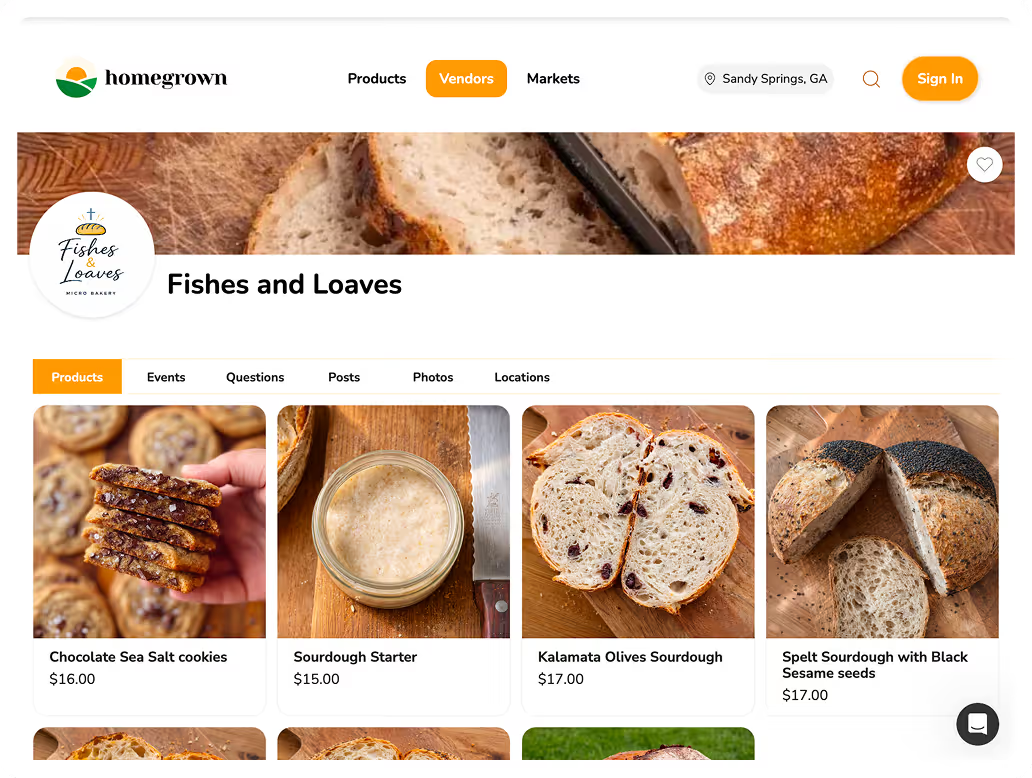
- Online ordering page. Every product listing gets a photo. Etsy lets you add photos but charges 6.5 percent per sale plus listing fees, and is designed for shipping — not farm stand pickup. Instagram is built for photos but does not let customers order directly from the image. Homegrown costs $10/month with no percentage fees beyond standard payment processing (2.9 percent plus $0.30 per transaction) and lets you upload photos for each product alongside prices and ordering — customers see the photo, tap to order, and pay in one step. Homegrown does not edit your photos, teach you photography, or manage your social media — it gives your photos the one job they need: converting a browser into a buyer.
- Social media. Post your best photos on Instagram and Facebook when you stock the stand.
- Chalkboard sign. Print a few photos and laminate them to display at the stand alongside your chalkboard sign.
- Market applications. Many farmers markets ask for product photos in the vendor application.
- Press pitches. When pitching local press (see our guide to getting local press coverage), include 2 to 3 of your best photos. Reporters are much more likely to cover a visually compelling story.
Frequently Asked Questions
Do I Need to Photograph Every Product?
Photograph every product you sell online. For in-person selling at the stand, photos are optional but helpful on signage and social media. Prioritize your best sellers and most visually appealing products first, then photograph the rest as time allows.
How Often Should I Update Photos?
Update photos seasonally as your product lineup changes. If you sell tomatoes from June through September, one good photo session in June covers the whole season. New products need new photos. Otherwise, a good photo lasts until the product changes.
Can I Use AI to Generate Product Photos?
Do not use AI-generated food photos for your product listings. Customers expect to see the actual product they will receive. An AI-generated photo of perfect tomatoes sets expectations that real tomatoes cannot meet. Authenticity is a core value of farm stand shopping — real photos of your real products build trust that AI images undermine.
What About Video?
Short video clips (5 to 15 seconds) of you picking produce, slicing bread, or pouring honey are excellent for social media but not necessary for product listings. A still photo is sufficient for your ordering page. Save video for Instagram Stories and Reels where the format is designed for it.
My Products Do Not Look as Good as Grocery Store Products. Is That Okay?
Yes. Farm stand customers are not looking for grocery store perfection. A slightly irregular heirloom tomato, a rustic sourdough with an uneven rise, or eggs with natural shell variations all signal "real farm product" — which is exactly what customers want. Photograph your products honestly. The imperfection is the selling point.
The Photo Sells the Product Before You Do
A customer who sees a bright, clear photo of your ripe tomatoes or golden sourdough makes the decision to buy before reading a word of your description. Investing 30 minutes per week in product photography — using your phone, near a window, on a clean background — is the highest-ROI marketing activity for any farm stand with an online presence. The SBA's business growth guide covers additional marketing strategies for small businesses, and the USDA local food directory is another place to showcase your products with the photos you have taken.